Fate fragments: Difference between revisions
Jump to navigation
Jump to search
TheDiabeto (talk | contribs) No edit summary |
m (Update links of individual pieces to new cursed pharaoh set page) |
||
| (15 intermediate revisions by 3 users not shown) | |||
| Line 1: | Line 1: | ||
'''{{{name|{{PAGENAME}}}}}''' are extracted from various cosmetic/rare equipment. These fragments are | '''{{{name|{{PAGENAME}}}}}''' are extracted from various cosmetic/rare equipment. These fragments are used for upgrading your Miscellaneous [[Perks|perks]]. Main accounts can always buy these items and scrap them for '''Fate fragments''', ironmen on the other hand, are limited in that regard. | ||
For ironmen, doing Kanto [[Slayer|slayer]], investing in a [[Shiny charm (i)]], then scrapping [[Undead heart|Undead hearts]], [[Mystic ticket|Mystic tickets]], and buying [[Ring of wealth (i)]] from the [[Slayer shop]] is your best bet. | |||
{|class="wikitable" align="right" | {|class="wikitable" align="right" | ||
! colspan="2" | <center>{{{name|{{PAGENAME}}}}}</center> | ! colspan="2" | <center>{{{name|{{PAGENAME}}}}}</center> | ||
| Line 48: | Line 50: | ||
|[[Undead heart]] | |[[Undead heart]] | ||
|[[File:Fate fragments 30.png]] | |[[File:Fate fragments 30.png]] | ||
|- | |||
|[[File:Psychic xmas kit.png|frameless]] | |||
|[[Psychic xmas kit]] | |||
|[[File:Fate fragments 50.png|frameless]] | |||
|[[File:Psychic ornament kit.png|frameless]] | |||
|[[Psychic ornament kit]] | |||
|[[File:Fate fragments 50.png|frameless]] | |||
|- | |- | ||
|[[File:Apocalypse set.png|frameless]] | |[[File:Apocalypse set.png|frameless]] | ||
| Line 75: | Line 84: | ||
|[[File:3rd age range coif.png|frameless]] | |[[File:3rd age range coif.png|frameless]] | ||
|[[3rd age range coif]] | |[[3rd age range coif]] | ||
|[[File:Fate fragments.png]] | |[[File:Fate fragments 100.png]] | ||
|- | |- | ||
|[[File:3rd age range top.png|frameless]] | |[[File:3rd age range top.png|frameless]] | ||
| Line 88: | Line 97: | ||
|[[File:Fate fragments 100.png]] | |[[File:Fate fragments 100.png]] | ||
|[[File:3rd age mage hat.png|frameless]] | |[[File:3rd age mage hat.png|frameless]] | ||
|[[3rd age mage hat] | |[[3rd age mage hat]] | ||
|[[File:Fate fragments 100.png]] | |[[File:Fate fragments 100.png]] | ||
|- | |- | ||
| Line 129: | Line 138: | ||
|[[Blue dragon mount]] | |[[Blue dragon mount]] | ||
|[[File:Fate fragments 100.png]] | |[[File:Fate fragments 100.png]] | ||
|[[File:Purple dragon mount | |[[File:Purple dragon mount.png|frameless]] | ||
|[[Purple dragon mount]] | |[[Purple dragon mount]] | ||
|[[File:Fate fragments 100.png]] | |[[File:Fate fragments 100.png]] | ||
| Line 156: | Line 165: | ||
|[[File:Red partyhat.png|frameless]] | |[[File:Red partyhat.png|frameless]] | ||
|[[Red partyhat]] | |[[Red partyhat]] | ||
|[[File:Fate fragments | |[[File:Fate fragments 125.png|frameless]] | ||
|[[File:Blue partyhat.png|frameless]] | |[[File:Blue partyhat.png|frameless]] | ||
|[[Blue partyhat]] | |[[Blue partyhat]] | ||
| Line 175: | Line 184: | ||
|[[File:Fate fragments 125.png]] | |[[File:Fate fragments 125.png]] | ||
|- | |- | ||
|[[File:Black | |[[File:Black mount.png|frameless]] | ||
|[[Black dragon mount]] | |[[Black dragon mount]] | ||
|[[File:Fate fragments 150.png]] | |[[File:Fate fragments 150.png]] | ||
| Line 182: | Line 191: | ||
|[[File:Fate fragments 150.png]] | |[[File:Fate fragments 150.png]] | ||
|- | |- | ||
|[[File: | |[[File:Toymaker set.png|frameless]] | ||
|[[ | |[[Toymaker set]] | ||
|[[File:Fate fragments | |[[File:Fate fragments 150.png]] | ||
|[[File: | |[[File:Hallowguard set.png|frameless]] | ||
|[[ | |[[Hallowguard set]] | ||
|[[File:Fate fragments 100.png]] | |[[File:Fate fragments 150.png]] | ||
|- | |||
| | |[[File:Mask mutagen.png|frameless]] | ||
|[[Mask mutagen]] | |||
|[[File:Fate fragments 150.png]] | |||
|[[File:Santa hat.png|frameless]] | |||
|[[Santa hat]] | |||
|[[File:Fate fragments 150.png]] | |||
|- | |||
|[[File:Dodrio mount.png|frameless]] | |||
|[[Dodrio mount]] | |||
|[[File:Fate fragments 160.png]] | |||
|[[File:Yellow halloween mask.png|frameless]] | |||
|[[Yellow halloween mask]] | |||
|[[File:Fate fragments 175.png]] | |||
|- | |||
|[[File:Orange halloween mask.png|frameless]] | |||
|[[Orange halloween mask]] | |||
|[[File:Fate fragments 175.png]] | |||
|[[File:Purple halloween mask.png|frameless]] | |||
|[[Purple halloween mask]] | |||
|[[File:Fate fragments 175.png]] | |||
|- | |||
|[[File:Sky blue halloween mask.png|frameless]] | |||
|[[Sky blue halloween mask]] | |||
|[[File:Fate fragments 175.png]] | |||
|[[File:Elite set.png|frameless]] | |||
|[[Elite set]] | |||
|[[File:Fate fragments 175.png]] | |||
|- | |||
|[[File:Boss Bestiary.png|frameless]] | |||
|[[Boss Bestiary]] | |||
|[[File:Fate fragments 200.png|frameless]] | |||
|[[File:Easter kit.png|frameless]] | |||
|[[Easter kit]] | |||
|[[File:Fate fragments 100.png|frameless]] | |||
|- | |||
|[[File:Sleigh.png|frameless]] | |||
|[[Sleigh]] | |||
|[[File:Fate fragments 200.png]] | |||
|[[File:Cloud mount.png|frameless]] | |||
|[[Cloud mount]] | |||
|[[File:Fate fragments 200.png]] | |||
|- | |||
|[[File:Cursed pharaoh hood.png|frameless]] | |||
|[[Cursed pharaoh set|Cursed pharaoh hood]] | |||
|[[File:Fate fragments 200.png]] | |||
|[[File:Cursed pharaoh robetop.png|frameless]] | |||
|[[Cursed pharaoh set|Cursed pharaoh robetop]] | |||
|[[File:Fate fragments 200.png]] | |||
|- | |||
|[[File:Cursed pharaoh robeskirt.png|frameless]] | |||
|[[Cursed pharaoh set|Cursed pharaoh robeskirt]] | |||
|[[File:Fate fragments 200.png]] | |||
|[[File:Voltorb mount.png|frameless]] | |||
|[[Voltorb mount]] | |||
|[[File:Fate fragments 225.png]] | |||
|- | |||
|[[File:Pink partyhat.png|frameless]] | |||
|[[Pink partyhat]] | |||
|[[File:Fate fragments 250.png|frameless]] | |||
|[[File:Anniversary crown.png|frameless]] | |||
|[[Anniversary crown]] | |||
|[[File:Fate fragments 250.png|frameless]] | |||
|- | |- | ||
|[[File:Red partyhat&specs.png|frameless]] | |||
| | |Any partyhat & specs | ||
|[[File: | |[[File:Fate fragments 250.png|frameless]] | ||
|[[ | |[[File:Pink partyhat&specs.png|frameless]] | ||
|[[Pink partyhat & specs]] | |||
|[[File:Fate fragments 350.png|frameless]] | |||
|- | |- | ||
|[[File: | |[[File:Cursed pharaoh staff.png|frameless]] | ||
|[[ | |[[Cursed pharaoh set|Cursed pharaoh staff]] | ||
|[[File:Fate fragments 300.png]] | |||
|[[File:Black santa hat.png|frameless]] | |||
|[[Black santa hat]] | |||
|[[File:Fate fragments 400.png]] | |||
|- | |- | ||
|[[File:Helicopter mount.png|frameless]] | |||
| | |[[Helicopter mount]] | ||
|[[File: | |[[File:Fate fragments 450.png]] | ||
|[[ | |[[File:3rd age pickaxe.png|frameless]] | ||
|[[3rd age pickaxe]] | |||
|[[File:Fate fragments 500.png]] | |||
|- | |- | ||
|[[File: | |[[File:3rd age axe.png|frameless]] | ||
|[[ | |[[3rd age axe]] | ||
|[[File:Fate fragments 500.png]] | |||
|[[File:Gold partyhat.png|frameless]] | |||
|[[Gold partyhat]] | |||
|[[File:Fate fragments 600.png]] | |||
|- | |- | ||
|[[File:Golden dragon mount.png|frameless]] | |||
| | |[[Golden dragon mount]] | ||
|[[File: | |[[File:Fate fragments 750.png]] | ||
|[[ | |[[File:Christmas cracker.png|frameless]] | ||
|[[Christmas cracker]] | |||
|[[File:Fate fragments 800.png]] | |||
|- | |- | ||
|[[File: | |[[File:Black partyhat.png|frameless]] | ||
|[[ | |[[Black partyhat]] | ||
|[[File:Fate fragments 800.png]] | |||
| | |||
| | |||
| | |||
|} | |} | ||
== Miscellaneous Perks == | |||
{| class="wikitable align-center-2 align-center-3" style="display: inline-table; align-left" | |||
|+<h3>High Roller<h3> | |||
{| class="wikitable" style="display: inline-table; align-left" | |||
|+<h3> | |||
!Tier | !Tier | ||
!Main Cost | !Main Cost | ||
!Ironman Cost | !Ironman Cost | ||
|- | |- | ||
|[[File: | |[[File:High Roller Bronze.png]] | ||
|[[File: | |[[File:Fate fragments 250.png|link=Fate fragments]] | ||
|[[File: | |[[File:Fate fragments 125.png|link=Fate fragments]] | ||
|- | |- | ||
|[[File: | |[[File:High Roller Silver.png]] | ||
|[[File: | |[[File:Fate fragments 500.png|link=Fate fragments]] | ||
|[[File: | |[[File:Fate fragments 250.png|link=Fate fragments]] | ||
|- | |- | ||
|[[File: | |[[File:High Roller Gold.png]] | ||
|[[File: | |[[File:Fate fragments 750.png|link=Fate fragments]] | ||
|[[File: | |[[File:Fate fragments 375.png|link=Fate fragments]] | ||
|- | |- | ||
|[[File: | |[[File:High Roller Diamond.png]] | ||
|[[File: | |[[File:Fate fragments 1000.png|link=Fate fragments]] | ||
|[[File: | |[[File:Fate fragments 500.png|link=Fate fragments]] | ||
|- | |- | ||
|[[File: | |[[File:High Roller Mythic.png]] | ||
|[[File: | |[[File:Fate fragments 1250.png|link=Fate fragments]] | ||
|[[File: | |[[File:Fate fragments 625.png|link=Fate fragments]] | ||
|} | |} | ||
{| class="wikitable" style="display: inline-table; align-left" | {| class="wikitable align-center-2 align-center-3" style="display: inline-table; align-left" | ||
|+<h3> | |+<h3>Lucky break<h3> | ||
!Tier | !Tier | ||
!Main Cost | !Main Cost | ||
!Ironman Cost | !Ironman Cost | ||
|- | |- | ||
|[[File: | |[[File:Lucky Break Bronze.png]] | ||
|[[File: | |[[File:Fate fragments 250.png|link=Fate fragments]] | ||
|[[File: | |[[File:Fate fragments 125.png|link=Fate fragments]] | ||
|- | |- | ||
|[[File: | |[[File:Lucky Break Silver.png]] | ||
|[[File: | |[[File:Fate fragments 500.png|link=Fate fragments]] | ||
|[[File: | |[[File:Fate fragments 250.png|link=Fate fragments]] | ||
|- | |||
|[[File:Lucky Break Gold.png]] | |||
|[[File:Fate fragments 750.png|link=Fate fragments]] | |||
|[[File:Fate fragments 375.png|link=Fate fragments]] | |||
|- | |||
|[[File:Lucky Break Diamond.png]] | |||
|[[File:Fate fragments 1000.png|link=Fate fragments]] | |||
|[[File:Fate fragments 500.png|link=Fate fragments]] | |||
|- | |||
|[[File:Lucky Break Mythic.png]] | |||
|[[File:Fate fragments 1250.png|link=Fate fragments]] | |||
|[[File:Fate fragments 625.png|link=Fate fragments]] | |||
|} | |||
{| class="wikitable align-center-2 align-center-3" style="display: inline-table; align-left" | |||
|+<h3>Major Urner<h3> | |||
!Tier | |||
!Main Cost | |||
!Ironman Cost | |||
|- | |- | ||
|[[File: | |[[File:Major Urner Bronze.png]] | ||
|[[File: | |[[File:Fate fragments 50.png|link=Fate fragments]][[File:Gilded urn.png|link=Gilded urn]] | ||
|[[File: | |[[File:Fate fragments 25.png|link=Fate fragments]][[File:Gilded urn.png|link=Gilded urn]] | ||
|} | |||
{| class="wikitable align-center-2 align-center-3" style="display: inline-table; align-left" | |||
|+<h3>Bonafide<h3> | |||
!Tier | |||
!Main Cost | |||
!Ironman Cost | |||
|- | |- | ||
|[[File: | |[[File:Bonafide Bronze.png]] | ||
|[[File: | |[[File:Fate fragments 75.png|link=Fate fragments]][[File:Bonecrusher.png|link=Bonecrusher]] | ||
|[[File: | |[[File:Fate fragments 37.png|link=Fate fragments]][[File:Bonecrusher.png|link=Bonecrusher]] | ||
|} | |||
{| class="wikitable align-center-2 align-center-3" | |||
|+<h3>Autoswap<h3> | |||
!Tier | |||
!Main Cost | |||
!Ironman Cost | |||
|- | |- | ||
|[[File: | |[[File:Autoswap Bronze.png]] | ||
|[[File: | |[[File:Fate fragments 200.png|link=Fate fragments]] | ||
|[[File: | |[[File:Fate fragments 100.png|link=Fate fragments]] | ||
|} | |} | ||
Latest revision as of 15:35, 4 January 2025
Fate fragments are extracted from various cosmetic/rare equipment. These fragments are used for upgrading your Miscellaneous perks. Main accounts can always buy these items and scrap them for Fate fragments, ironmen on the other hand, are limited in that regard.
For ironmen, doing Kanto slayer, investing in a Shiny charm (i), then scrapping Undead hearts, Mystic tickets, and buying Ring of wealth (i) from the Slayer shop is your best bet.
| Tradeable | No |
| Equipable | No |
| Stackable | Yes |
| Noteable | No |
| Options | Use,Drop |
| Examine | Fate fragments |
Scrap value
Scrapping items at the Arcane compressor gives 10% extra fragments.
Miscellaneous Perks
| Tier | Main Cost | Ironman Cost |
|---|---|---|
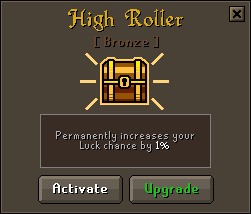
|
||
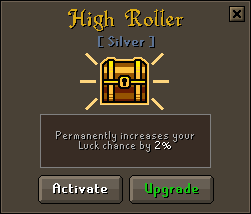
|
||

|
||
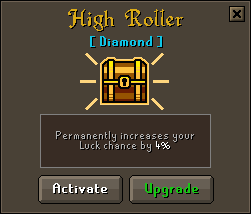
|
||
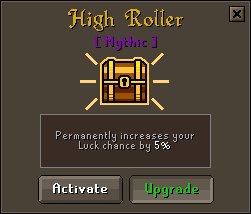
|
| Tier | Main Cost | Ironman Cost |
|---|---|---|

|
||

|
||
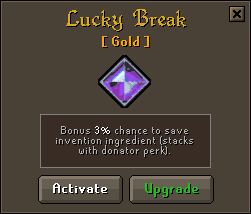
|
||

|
||
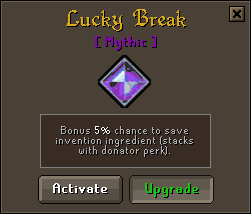
|
| Tier | Main Cost | Ironman Cost |
|---|---|---|

|
| Tier | Main Cost | Ironman Cost |
|---|---|---|
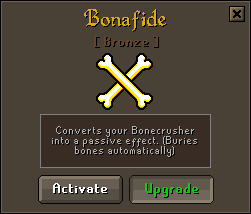
|
| Tier | Main Cost | Ironman Cost |
|---|---|---|
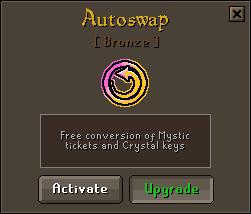
|